Whether you’re just starting to grow cannabis or you’ve been at it for a while, it’s a good idea to know what to expect during the cannabis flowering cycle. The cannabis plant has a variety of characteristics during the different stages of its lifecycle – which include germination, the vegetative stage and the flowering stage – but for many home growers, the final flowering stage is the most exciting.
A lot of it is because this stage reveals what the quality and quantity of your harvest will be. Understanding the process makes growing easier. This article will go in-depth into the cannabis flowering stages, so that you can harvest higher quality buds.
The flowering stage begins once the vegetative phase has ended. This usually takes 3-4 weeks, but can vary by the strain, so be sure to consider your strain first. If you are growing your cannabis indoors from photoperiod seeds, the flowering stage starts when you change to a 12/12 light schedule (this is when the plants receive light for 12 hours and are in total darkness for 12 hours).
If you use autoflowering seeds, the plant’s genetics determines when this period begins. Once flowering begins, the cannabis flowering stages last approximately 7-9 weeks. They can be divided into the following sub-phases.
When the plants start receiving 12 hours of darkness each day, they “think” that winter is close, and prepare to produce offspring. The first of the cannabis flowering stages, therefore, includes a major spurt of vegetative growth aimed at giving the plant ample size and strength to support those coming buds. This stretch is so dramatic that most cannabis plants double or even triple their height during this time.
This is a good time for your plant. During this flowering stretch, your cannabis plants will still be very resilient and can quickly recover from any problem that they experience. This resiliency also occurs during the vegetative growth stage.
During the flowering stage your plant starts diverting energy from vegetative growth into bud production that it believes will help produce offspring. Without pollen from a male plant, your cannabis plant will use the energy that would go into producing seeds for increasing the size and number of buds that usually contain these seeds.
Some cannabis growers believe the growth spurt during this phase means that your cannabis plants still need the same types of nutrients that were used during the vegetative growth phase, such as nitrogen.
Another school of thought suggests that introducing nutrients needed for bud production such as phosphorous and magnesium can limit the amount of stretch and help jump-start the plant’s budding by having these nutrients available already. Regardless of which you believe, the plant should gradually be switched from a vegetative line of nutrients to a blooming line throughout this period.
You will also notice single leaves starting to bunch up at the top of the main colas of each plant. White pistils will emerge from the middle of these bunches of leaves. This is a sign of new buds being produced.
If you are going to try your hand at training your plants, now is the time. Low stress training (LST) involves bending the stems of the branches gently so that you have a flat canopy at the top. This flat canopy is critical to ensure even distribution of light to all parts of the plant.
For outdoor grows this training is generally unnecessary as the sun will naturally pass across most of the plant’s surface throughout the day. Sections without direct access to light will not produce mature buds and are often removed so the plant can put more energy into the parts that do receive plenty of light.

The flowering stretch (spurt of growth) starts slowing down when your cannabis plants start forming tiny buds (also known as budlets). Now, we enter the second leg of the cannabis flowering cycle. Each stage of the bloom cycle is more critical than the last, so you should be very careful since any mistake or problem can impact your yield or the quality of your harvest.
Use this time to observe your plants carefully for any signs of problems. The easiest signs are the symptoms visible on the leaves. For example, nutrient toxicity or “nute burn” (excess nutrients that cause something that looks like a burn on the leaves) causes the tips of your leaves to become brown or yellow.
If you don’t reduce the amount of nutrients provided, this burn will spread to other parts of the leaves, and the plant may be severely affected. If untreated, your plant will no longer be able to manufacture its own food.
Nutrient deficiencies are slightly less detrimental as too many nutrients (because it’s easier to introduce nutrients to the plant tissue than remove nutrients, and there are some that cannot be removed that are called ‘immobile nutrients’), but you should still keep track of what you feed your plants and adjust as needed as soon as you determine a problem. Your plants can still recover to some extent, but it’s still much better not to have any problems to fix in the first place.
You will also notice that some leaves at the bottom of your plants will become yellow around this time. If only a few leaves are affected, don’t fret. It is normal for some of the bottom leaves to yellow if they aren’t receiving ample light (the canopy is thick at this point). The plant is extracting all the nutrients from those leaves to keep the developing buds well taken care of. Plants are intelligent; they don’t want to waste resources on components that aren’t productive!
These weeks are exciting because they mark the time when the plants begin giving off a more distinct odor.

Next up in the cannabis flowering stages is the fattening of the “budlets.” The tiny buds described earlier start to fatten quickly. This fattening happens rapidly, and you will still see the pistils sticking out of them.
The “flowering stretch” is almost no more during these weeks, so there is minimal need for you to continue training your cannabis plants. The plant is now fully focused on its buds.
However, you can still do some training if you notice that the canopy of some of your plants isn’t as flat as you would like it to be. Keep in mind, training during this time can be risky. Unlike during the flowering stretch, any training done now is more stressful to the plant as vegetative growth has mostly stopped. The plant can recover but try as much as you can to avoid this type of training, since it could significantly slow the fattening of your buds.
Since your plants aren’t growing any more leaves at this point, do everything you can to preserve the existing leaves. First, provide the correct amount of balanced nutrients, so that nutrient burn or nutrient deficiency doesn’t cause leaves to yellow or become necrotic. Second, provide enough water since transpiration will be taking place at a high rate. Excess stress from improper humidity, heat, or light levels can also cause leaves to yellow and drop off.
Don’t try your hand at removing leaves (defoliating) unless you are experienced at it and can strategically remove the correct leaves that will expose additional bud sites.
You want to maintain as many leaves as necessary to create a full canopy because if you remove too many after this point, your plant may not have enough foliage to absorb enough light to maximize yields. However, if you have plenty of healthy leaves, there is a “reserve” of leaves that will help the plant continue to thrive.
As this portion of the flowering stage progresses, the majority of the pistils will remain white, signifying that the buds are continuing to get denser and bigger with each passing day.

When the flowering pot start to ripen, you’re beginning the next cannabis flowering stage. Any vegetative growth has completely stopped by this point, and all energy is devoted to the cannabis plant’s final stages of life. The buds will grow largest during this time, which is why it is important not to provide any nutrients that promote vegetative growth. This would be wasteful and even counterproductive.
Why are nutrients like nitrogen counterproductive at this point? The reason is that these nutrients are not being used to the same extent that they were during the vegetative stage. This causes an accumulation in the leaves that negatively affects the quality of the buds after harvest. If too much nitrogen is present, the plant can even get stressed and revert to vegetative growth or self-pollinate and start producing seeds, which negatively affect the quality and quantity of harvest.
The bottom leaves on some plants begin yellowing and falling off during this stage while other plants begin losing leaves during Week 4-6 of the flowering phase. Nevertheless, you still need to be vigilant so that you don’t mistake a problem for normal leaf loss. If all is as it should be, your plants should stay full and green with just a few bottom leaves discoloring or possibly falling off.
During this portion of the many cannabis flowering stages, you may notice buds that form beneath or on the sides of existing buds. This phenomenon is called “foxtailing,” and while it can be observed naturally with some strains, it is more typically a sign of environmental stress, either from too much light or too high temperatures. Find out which applies to your situation and adjust accordingly.
For example, if your plants grew taller than expected and are now close to your grow lights, then you should raise the lights higher so that the plants don’t suffer from light burn.
Or, if you find that sections of your grow room have a higher temperature than what is recommended for plants at this stage, increase the air flow so that heat can be exhausted more efficiently.
Excess light or temperature can bleach or burn the buds (causing them to be discolored). The buds will also lose some of their potency (THC) since evaporation will cause the plant to lose some of its cannabinoids. Do you still need convincing about the importance of maintaining the right light and temperature levels?
The exact week on which you will harvest is mainly dependent on the strain that you are growing. The harvest window is typically around a week long, after which THC will start degrading into CBN, which is less potent and produces a sleepy feeling. Near the end of flowering, the pistils on most strains (but not all) will change from white to orange.
It is a signal that new buds are not being produced by the plant anymore and harvest time is likely close. The trichomes of your plants will turn from clear to milky as they increase in THC, and then start changing color progressively to amber, signifying THC that is degrading into CBN. Both phases of this process overlap somewhat, but most growers believe your plants have reached their full potency level when roughly 5-30% of the trichomes are amber, and the rest are milky.
Be careful with your plants at this point. They are extremely sensitive to the conditions around them during the end of the grow. For example, without ample airflow excess moisture from transpiration can become trapped inside the constantly growing buds, causing the dreaded “bud rot” (botyritis, or gray mold) that often spreads and destroys entire harvests.
It is also common for some buds to become heavier than their branches can support during this phase of the cannabis flowering cycle. You may, therefore, need to support them so that they can stay upright. Use tools to prop your plants up – you can find them online or at many garden supply stores.
The end of the cannabis growing cycle also brings about the most distinctive “weed” odor. You can expect the smell to reach overpowering levels. Do not be surprised if neighbors and visitors ask about the smells drifting from your garage or wherever you are growing your indoor plants. Exhausting all air through a carbon filter can help with odor management.
Shortly before you are ready to harvest your buds, you should flush your plants. Flushing is a simple process where you stop giving your plant nutrients, and instead, feed them pH-appropriate water. You should flush your plants from a few days to a few weeks depending on the length of the strains’ flowering stage and your grow medium. Soil retains more nutrients than hydroponic mediums and so requires a longer flush.
The purpose of flushing is to give the plant a chance to utilize all the nutrients in its system so that they don’t taint the taste and smell of the buds. Flushing can also help remove any salts that have precipitated and built up in the grow medium. In short, flushing provides a final chance to improve the quality of the final harvest.

The flowering stage is rewarding, and if you understand the process, you can gain more from it. As you can see, there are five distinct cannabis flowering stages, each with their own characteristics and requirements. Proper oversight of each of these stages puts you firmly on the path to harvesting the biggest and most potent buds that your cannabis strains are capable of yielding.
Keep in mind, this article only provides a general guide. You’ll still need to tweak your process based on the specific cannabis strain you plan to grow. However, remember that every cannabis strain goes through theses stages – even the easy-to-grow autoflowering strains. The main difference with these strains is the fact that they reach the flowering stage regardless of what light cycle they’re on. For them, the onset of flowering is triggered by their genetic code rather than a change in the number of hours of darkness each day. That is precisely why autoflowering strains come highly recommended when growing with our kits!
Growing marijuana can be easy – especially when you understand the cannabis flowering stages. Have fun growing your next cannabis plant, and once you’re done flowering check out our article on harvesting and drying!
Besides the flowering stages, cannabis growth consists of a series of stages during the plant’s life cycle. Each stage has its own unique demands, like varying levels of light, nutrients, and water.
It can take between four and eight months to grow a cannabis plant from start to finish fully! This time varies depending on where you’re growing, and if you use an indoor grow room, your plant can flower in only a few weeks!
The quality of your cannabis plant depends on how well you know your plants’ growth stages and life cycle. It all starts with germination.
If you want your seeds to germinate effectively, they must be mature enough for germination; immature seeds will rarely do anything. Once your seeds reach maturity, you’ll notice that they appear shiny, hard and dry to the touch, and light to dark brown.
Underdeveloped seeds will look white or green and feel soft.
The germination process is relatively simple—keep the seeds wet and in a dark place. You can also keep your seed wrapped in a damp paper towel or a cup of water and place it inside of a cabinet. Exposing the seeds to moisture helps stimulate the hormones that boost their growth process.
The seedling growth stage is a crucial and fragile one. Your cannabis seedlings need 18+ hours of sunlight, mild humidity, and moist soil to grow quickly and adequately. In addition, the seedlings have small root systems, which makes it easy to overwater and damage them.
Once your plant becomes a seedling, you’ll notice it start to produce traditional-looking cannabis leaves. These leaves can be made up of between three and thirteen fingers. Typically, a mature cannabis plant will have between five and seven fingers, but more or less isn’t super uncommon.
The first fingered leaves can be up to four inches above the cotyledon leaves and will typically grow in pairs on opposing sides of the plant’s stem. You’ll treat your cannabis plant as a seedling until it develops leaves containing a full number of fingers.
Healthy seedlings are short, have thick vegetation, and sprout vibrant green leaves. You want to keep your environment free of excess moisture during this growth stage to avoid disease and mold.
Once your seedling develops a full set of fingered leaves, the vegetative growth stage begins. After being transferred to a larger pot, you’ll notice the plant’s growth speed up dramatically. Its stem gets thicker and taller, its root system becomes stronger, and it produces more nodes, branches, and leaves.
This is the stage where many growers begin training and topping their plants.
The spacing between the nodes shows the type of cannabis that’s growing. These nodes, which are areas where two branches come off the main stem, develop in pairs. However, the nodes start to alternate once a plant matures, leaving more distance between them.
Indica plants are short and dense, while Sativa plants are lanky and have less leaves. During this stage, it’s crucial to increase the amount of water your plant gets. As it continues to grow and the root system becomes more established, you’ll want to water it further away from the center so that the roots can absorb it more easily.
If you’re growing indoors, you’ll want to keep your cannabis plants on a cycle of 18-hours of light during this stage.
One to two weeks after the vegatative growth stage, pre-flowering will start. This stage is when you’ll determine the sex of the plant.
Female plants will have two pistils growing on the buds, and male plants will have small green sacs of pollen around the node areas.
Those sacs will eventually burst, fertilizing the cola of female plants and ruining their trichomes’ psychoactive potential. That’s why we need to remove any intersex or male plants before the flowering begins.
Non-pollinated female cannabis plants will produce Sinsemilla, have no seeds, and produce even more cannabinoids. Sensimilla has a high concentration of the compounds responsible for making us feel good when consuming cannabis. These plants will produce large amounts of resin and seed pods that contain high THC levels.
You can identify Sinsemilla by the white hairs sprouting from bracts near the plant’s nodes. Once it starts receiving less light each day (about 12 hours), its growth will slow, and the plant will enter its flowering stage.
We won’t spend too much time here—the flowering stages are described in-depth above. However, here’s a quick summary of the cannabis plant flowering stage.
It occurs when the plant starts receiving 12 hours of darkness each day. You’ll know that it’s ready for harvesting when the pistils go from white to orange, and the trichome heads will change from transparent to an amber color. A darker amber color indicated higher amounts of CBD compared to THC in the resin.
The trichomes produce terpenes, flavonoids, THC, and other cannabinoids. As the flower sluters continue to develop, they’ll become sticky from the cannabinoid-rich resin. Most cannabis plants enjoy medium humidity, warm weather, and blooming nutrients during the flower stage.
Once you’re ready to harvest, you should cut down your cannabis plant into smaller branches to make the drying process easier. You’ll want to string and hang the cut branches in a dark, cool room to dry.
Typically, cannabis gets dried at humidity levels of 40-50% and hand for one to two weeks. The drying process is necessary to prevent bacteria and fungus from growing, and by removing moisture, you’re preserving the life of your cannabis plant.
The next step is options: curing your plant. This process involves aging the dried cannabis in airtight containers and storing them in temperatures between 50 and 60 °F. Curing typically improves burn quality, flavor, and reduces harshness.
What is the best soil for growing cannabis?
It’s important to get into the specifics before you rush into ploughing a field. Balcony growers are probably best-off using pots and containers that can be moved easily, while a sun-drenched, secluded cannabis plantation may require serious earthworks to create a fertile super soil. Always take care to maintain a pH of 6.0–7.0 for any soil grow.
What do cannabis plants look like in the beginning stages of flowering?
Your plants will transition to flowering and start forming tiny buds (also known as budlets).
When are cannabis plants ready for harvest?
There are two main techniques growers use to identify the right time to harvest marijuana plants. These two techniques are the “Pistil Method” and the “Trichome Method”. For the Pistil Method, if the vast majority of pistils (hairs) are still white and sticking out straight, then it’s too early to harvest. For the Trichome Method, look at trichomes under a magnifier to harvest cannabis buds with the right THC levels.
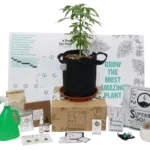
Ready to start growing your own cannabis? At a Pot for Pot, we make getting started easy—Get your pot for pot today!