Cannabis-growing newcomers and even those with a little more experience may all be asking the same question — When is the best time to harvest weed? There is a brief window of time, about two weeks long, when the plant’s trichomes contain the peak amount of THC. Harvesting during this peak THC window ensures the best high.
Think of it like growing any other garden variety plant; it has specific growth cycles, including the notorious flowering stage, and the trick is knowing where in the cycle your plant lies. Read more to find out various indicators that your plant is ready to harvest. After finding out when to harvest for the kind of high you want, find out how to harvest your precious buds, too.
Related: Growing Marijuana: Step-by-Step Guide
Most experienced growers will tell you that the hardest thing about growing their first marijuana plant was harvesting. Like whattaya mean you put in weeks of work and then you have to cut the plant down?!? Some have compared it to having to slaughter the family pig. Knowing when to expect this fateful chop down makes the stress a little more manageable. Once flowering has begun, indoor plants take approximately eight weeks until harvest, but outdoor plants can take even longer. Generally, the average bud harvest time is as follows:
Timing is key so that you don’t harvest too early (thus risking a lower potency) or too late (when potency and cannabinoids start to deteriorate). After waiting patiently for all those weeks, the last thing that any grower wants is to make a mistake and ruin the potency and quality of your weed.
Now that you know broadly when you should harvest, it is time to fine-tune that timing to harvest for the specific effects you want. Your plant will give you signs that it is ready, and you can use the following indicators to decide your optimal time to harvest.
Choose from one of three desired effects:
Related: How to Get Really High From Smoking Weed
This ultimate guide on harvesting weed will help keep you from making those mistakes during this crucial phase of your weed-growing adventure.

Pistils are the female sex organs of the cannabis plant, and they first begin to develop cannabis preflowers. Pistils help you determine whether or not your plants are male. Both female and intersex plants have stigmas. Part of the pistil, stigmas are the hairs you see sticking out from the calyxes of the buds on your plants. These are important structures as they are the pollen catchers for the plant. They appear to pop up somewhat intermittently and unpredictably.
When they’re first visible, stigmas are completely white like seen on the plant above. After time, they mature and turn a rich orange, red, or brown color. The stigmas can be more prone to falling off. They also curl back. Begin harvesting when approximately half of the stigmas darken and curl up. This will produce a mild high. You can get a stronger high when 70-90% of stigmas turn darker, but it’s important to keep in mind that the maturity of the stigmas are not the most reliable measure of readiness. An unpollinated cannabis plant can continue to produce fresh stigmas in a last ditch effort to try to get seeded and carry on her genetic line. Stigma color is ultimately a useful guidepost on the road to a successful harvest but should not be your only waypoint.
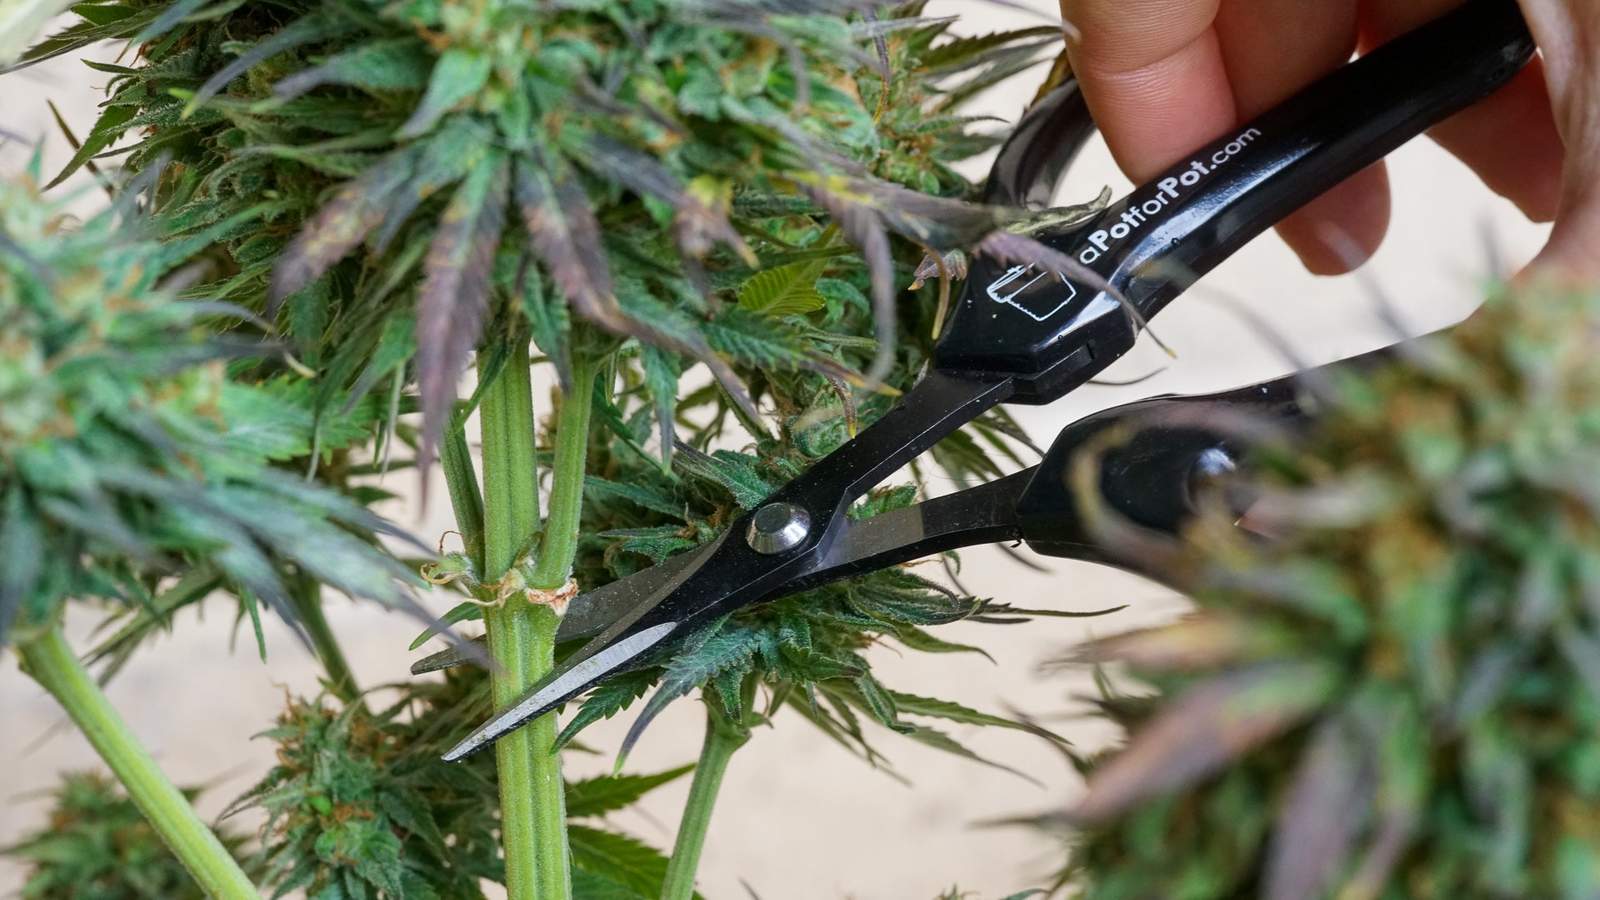
Trichomes are the more reliable measurement of plant maturity. The tricky part is getting close enough to see them! Using a magnifying lens, digital microscope, or jeweler’s loupe, take a close look at the trichomes or the tiny “crystals” covering the flowers.
These crystals give cannabis strains their unique aroma, taste, and cannabinoid profile. The trichomes are clear, shiny, and sticky. Immature cannabis buds have trichomes that are clear and glassy in appearance. Only start harvesting once you can see that at least 30-50% of the trichomes are milky white or cloudy or some even say looks like plastic.

This third method involves observing both trichomes and stigmas to get a more accurate signal that it is time to harvest your crop. Using both methods helps you to avoid pulling the trigger too quickly.
For instance, the trichomes could still be clear even though the stigmas changed color and orientation. Or, the trichomes may be cloudy, while the stigmas are still white. Therefore, observing a change in both trichomes and stigmas provides reliable proof that it is time to harvest.
There are a variety of different tools you can use to take a closer look at your plant. They include:
A smartphone magnifier lens is probably your cheapest option and might be a better bargain because you can also use it for other things. Fortunately, a smartphone magnifier lens and two other fun lenses are included in every a Pot for Pot Complete Grow Kit.
Timing is a pretty big deal when it comes to the quality of the finished product. Flavor, THC content, quality, and the user experience. Here’s what you need to know.
Don’t let your impatience get the best of you. If you harvest weed too early, you’ll have a lower amount of THC and CBD in your harvest, resulting in a lower high and a mild to weak flavor. You might also have a lower yield, and it might even have unwanted side effects, like headaches and intermittent highs.
If you harvest too late, your experience will be heavy and sleepy, some would say narcotic. As weed ages, THC degrades into CBN which is a sedative. You also run the risk of bud rot, molds, and pests.
It’s easier to predict harvesting time if you’re growing weed indoors because your plants are in a controlled environment. If you’re growing cannabis outdoors, your plants are subject to the weather and pests. On the other hand, growing cannabis indoors means you can control the climate and the lighting. You can more easily predict when it’s time to harvest, and even though your yield will be smaller, you can keep harvesting throughout the year.
Indica strains are usually ready for harvest after eight weeks of flowering, and Sativa strains of cannabis take a little longer and are usually ready after ten weeks. Autoflowering cannabis requires about ten weeks from seed to harvest. However, remember that these are just estimates. You must know what kind of high you want and how to look for visual clues so that you can harvest at the right time. The plant will tell you when she’d ready if you know how to look!
Here’s a step-by-step for the harvest process:
Preparing for harvesting is not something you can do in a day. Ideally you drop the temperature of your space down to around 68°F for the last two weeks or so of your plant’s life. Discontinue adding any additional nutrients at this time as well and water with only pH’ed water. Clean up the plant by defoliating, removing any damaged or shaded fan leaves.
We follow recent studies that prove that flushing does more harm than good. Flushing for one thing, is never necessary with soil-based grows. But flushing is not necessary with synthetic nutrient-fed grows either as long as you manage the salts throughout the grow. Definitely water with plain water for the last two weeks, but there’s no need to flood and stress out the plant’s roots.
Related: Why Cannabis Leaves Wilt, Sag, or Droop Down
Turn off the lights or remove lamps from the grow room to prevent light from affecting the THC during harvesting. If you’re harvesting weed outdoors, pick a dry day with little wind and not too much sun. It is best to harvest in the morning when the plant has the most resin for the day– this goes for both indoor and outdoor plants.

This is the fastest way to harvest weed a weed plant. It’s quick and easy because you don’t have to monitor individual buds with as much attention to detail. This is when you cut the entire plant down in one pass, cutting the base of the central stalk like a Christmas tree. This, while satisfying, can be hard to manage if you have large plants. For ease of hanging, we often suggest cutting down one branch at a time.
This is a more time-consuming method of trimming weed, but can produce a higher yield with better bud quality. Often, the top-most buds are ready before the bottom buds. This is a normal occurrence because of the relative light exposure between the top and bottom of the plant. In these cases, you harvest in stages– taking the top buds first and then circling back for the bottom buds in a few days. This also gives baby buds a chance to get more direct light and finish a little stronger.
When trimming the fan leaves from the buds, decide whether to do it before or after drying them. As a general rule, trim the leaves before drying if you’re in a humid environment, and keep the leaves on if you’re in a low-humidity environment before drying. Leaving the fan leaves in a humid environment may create mold, and leafless buds in low humidity may dry too quickly.
Keep in mind that fan leaves are easier to cut right after harvesting because they are still wet, and the softer trichomes are less likely to be accidentally removed.
Hang evenly with good ventilation for about 3-6 days at 50% humidity in a space that is 65℉. To test for readiness to move to the next step, try bending the thinnest stems, where the buds connect to the thicker stems. If the stem snaps instead of bending, they are properly dried. Then, it’s time to finish trimming (if needed) and seal them in a tight container to finish the curing process.
It’s time for the next step in our journey of learning how to harvest weed, bucking down. Once your weed has dried, you will need to remove the stems from the cannabis buds. Once again, use our trimming scissors to remove the stems.
To do this, cut the flower from its base, and leave the stem and most of the remaining leaves on the stalk. Professional marijuana-growing operations often use machines to automate this process. However, hand-trimmed weed (artisan) is highly desirable for many people.
Once you remove the stems from the cannabis buds, the next step is to sort those flowers. There are different ways to do this.
For example, you can use size as a basis for sorting. This is useful for many reasons, especially if you’re saving the bigger ones for specific purposes. Sorting is also a needed step when using automated trimmers. Those machines need the buds to be somewhat uniform in size.
Sorting also makes it easier to identify cannabis buds with defects, such as those attacked by mold or have abnormal shapes. Save the very small buds or those with undesirable shapes to turn into tinctures, cannabutter, or other concentrates.
 Trimming Weed
If you are dry trimming, this is when you manicure your marijuana buds by removing sugar leaves. Using handheld scissors, cut at an angle with an outward motion. Use a razor or a soft cloth to clean scissors to remove residue as you trim the weed, and use a little isopropyl alcohol to wipe the scissors if they get too sticky.
Now that you have harvested, dried, and trimmed your weed, it’s time for the final stage: the curing process. The main objective of curing is to concentrate the flavor and potency of your weed, and this is done by letting the buds evaporate the remaining moisture inside of them via a slow-drying process.
Curing is also done to make the weed last longer. After harvesting, bacteria break down the sugars and starches of your crop. The curing process helps the plants use these helpful sugars and starches before they dry out to stay preserved.
To cure your weed, pack it loosely in opaque glass containers. If you can’t find opaque containers, mason jars will work, but be sure to keep them out of the light. Next, cover your jars tightly and store them in a dark room.
In the initial days of curing, open the jars briefly (for about a minute). This is sometimes referred to as “burping” the jars because condensation or moist air is replaced with fresher and drier air.
As the curing process continues, adjust how often you burp the covered jars. For example, after about two weeks, you can start opening the jars every other day. Once your weed has been curing for more than a month, you can reduce this frequency to once every 5-7 days.
As the weed cures, the moisture inside the flowers is moved to the surface by capillary action. This is the moisture that forms the condensation on the walls of the container.
Another method for curing cannabis involves placing the buds in a paper bag. This process, like “burping,” helps prevent mold by removing excess moisture, and the paper will absorb excess wetness and allow the weed to cure. Just make sure not to put too much in one bag; you can place the bag horizontally, spread out the buds, and fold over the open side. This is a quick drying method that we do not recommend as it can lead to a harsh smoke.
One final way to avoid mold is to use a two-way humidity packet. These tools also help prevent weed from drying out. They can last for weeks or even months, so you won’t have to replace them during the curing process.
After two or so months, your weed will be sufficiently cured. At this time, the flavors, potency, and other nutrients will be at their peak. You can even sample your weed periodically to assess whether it has reached your desired potency and taste.
If your weed isn’t cured sufficiently, its quality will degrade rapidly, and it may not be as potent as it could have been.
Once your cannabis has been cured to the desired level, it is time to put it in long-term storage. You can use the same mason jars you used to cure the cannabis to store it for use later. In that case, just cover the jars tightly and keep them in a cool, dark location.
You could also transfer the weed to other containers, as long as you remember and respect the same requirements of airtightness and opaqueness. A cabinet or a closet are examples of appropriate storage locations for your cured weed.
Just as is the case with anything that you grow, there is no single harvest and post-harvest handling method that is the best in all situations. You may want to invest in a weed scale so that you can measure the weed you harvest, track yields, and change things from grow to grow.
Different things work for different people. However, regardless of how advanced weed harvesting becomes, it still comes down to trimming and sorting. As long as you have the right tools, you are well on your way to enjoying amazing marijuana.
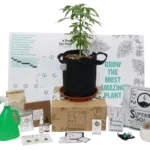
a Pot for a Pot is committed to making it easy to grow your own cannabis. We sell convenient weed growing kits and supplies to get you started. Shop our grow kits today.